Be sure to select the fitting Verson Thread Safe or Not.
Unzip the Package.
Copy php_imagick.dll into your php-root/ext-Directory. Copy all the other DLL-Files directly to your /php-root directory.
Add extension=imagick to your php.ini file. Restart your WebServer or your comand shell. Enter php -v in your command shell and check that there are no errors.
After such a long time i now found the time to update the streaming,rolandradio.net server and added a cron job to update the SSL certificate on a monthly base, so it shall not happen anymore that the streaming server is running out of its https capabilities and mini player on www.rolandradio.net doesnt streams audio in chrome and other paranoid browsers 😀
first be sure you have activated the curl-extension in your php.ini file.
After that get the cacert.pem file from curl – Extract CA Certs from Mozilla and safe it o your computer. i saved it into my php-directory. after that edit php.ini again and modify the following entry to point to the .pem.file:
[curl]
; A default value for the CURLOPT_CAINFO option. This is required to be an
; absolute path.
curl.cainfo = "C:\php\php80\cacert.pem"
First of all download the PHP-Version you want to install. In my case it will be the PHP 7.3 x64 Thread Save versio. This is the link to the download section on php.net: https://windows.php.net/download#php-7.3 In my case i downloaded the ZIP-file of VC15 x64 Thread Safe (2020-Oct-27 16:52:12). Unzip the ZIP archive to a new folde which will be your php installation folder. So choose wisely 🙂 I used c:\php\php73 for that. After you have unzipped the PHP-Archive you need to locate the file php.ini-development and rename it to php.ini.
Open the php.ini file in any texteditor and change the extension_dir settings to the choosen directory, followed by an /ext. In my case its c:\php\php73\ext. Or you can set it like below:
; On windows:
extension_dir = "ext"
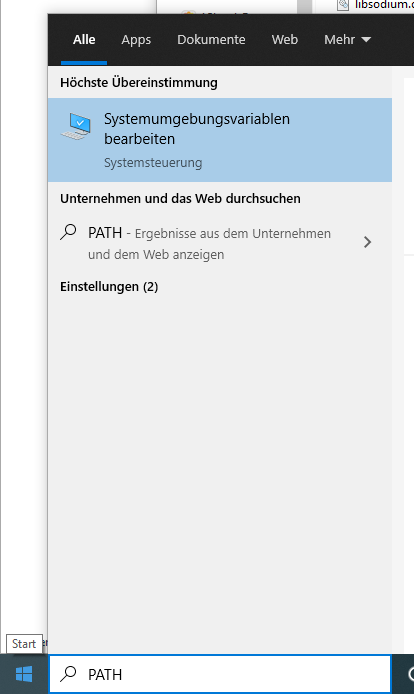
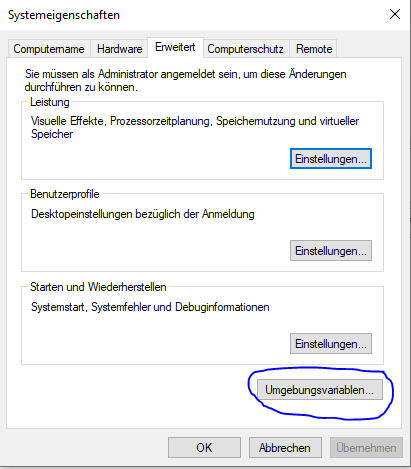
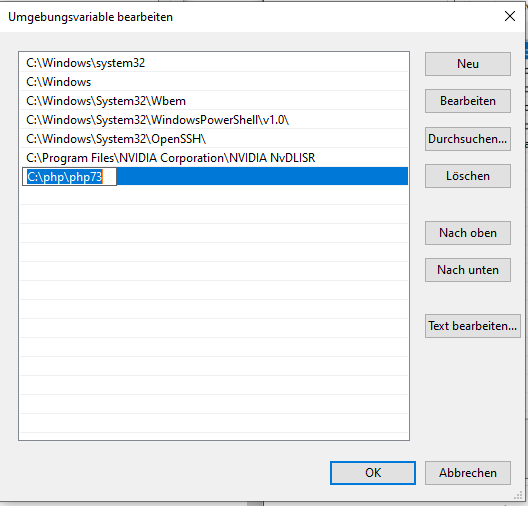
After that you need to add your path to the php-directory (in my case: C:\php\php73) to the Windows PATH variable. Search for “PATH” in the Windows Search-Bar to edit the environment variables.
Edit Environment Variables
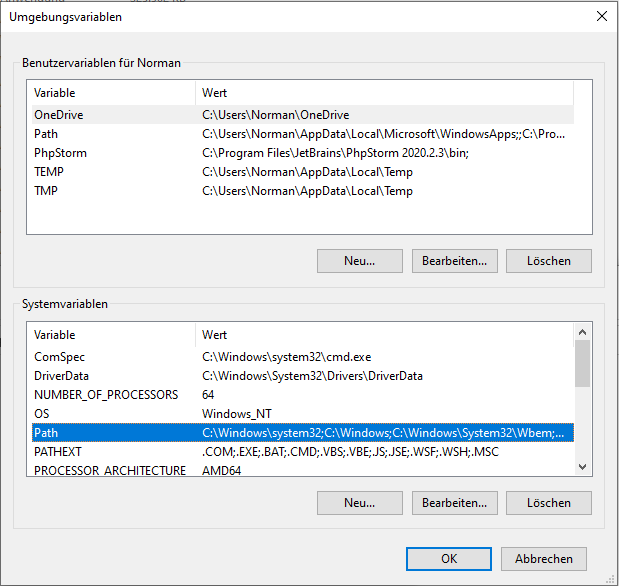
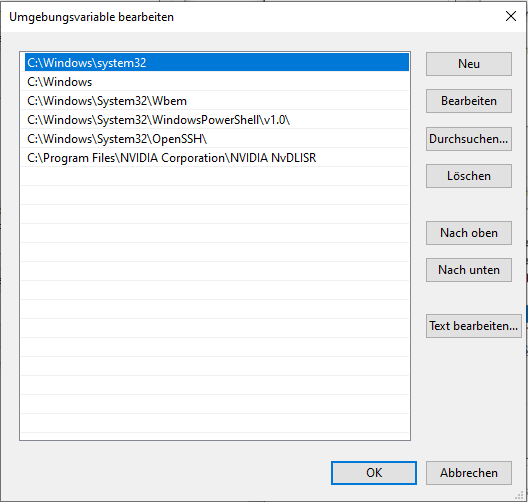
Search in the system variable for the Path entry and edit this to add your PHP-path
After you have added your line click ok on all Windows to save your settings
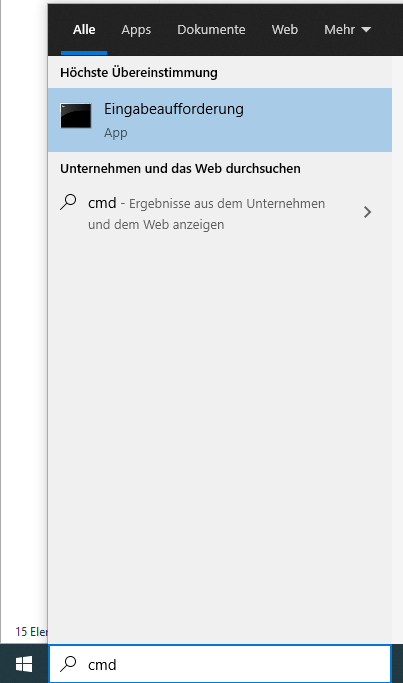
To verify everything worked correctly open your command shell by typing cmd into the windows search bar
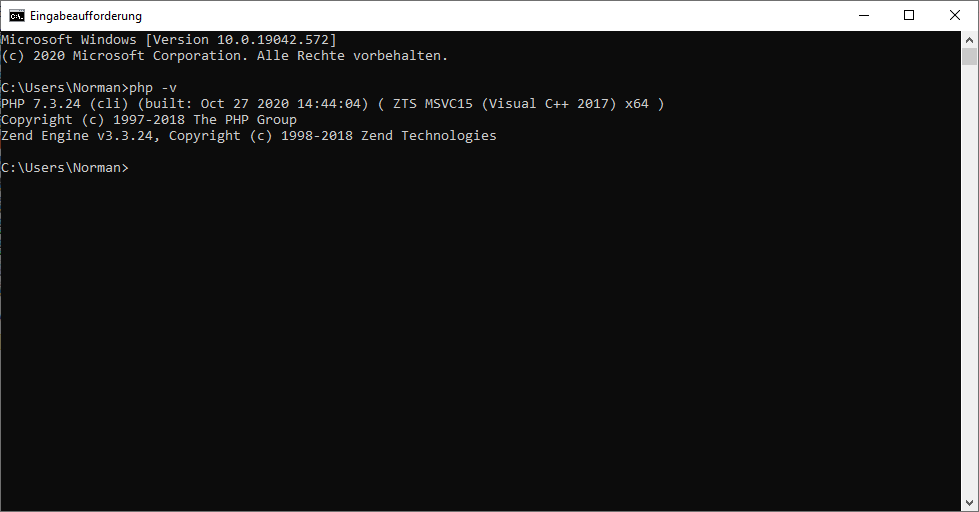
and type php -v in your command shell. You shall get the version information of your php installation. And now everything is done.
The same procedure is for every other php version like 7.x or 7.4. To install php in different directories (in my case C:\php\phpVERSION) gives you the chance to use different php version on Command Line Interface by setting the direct pth to the executable CLI.
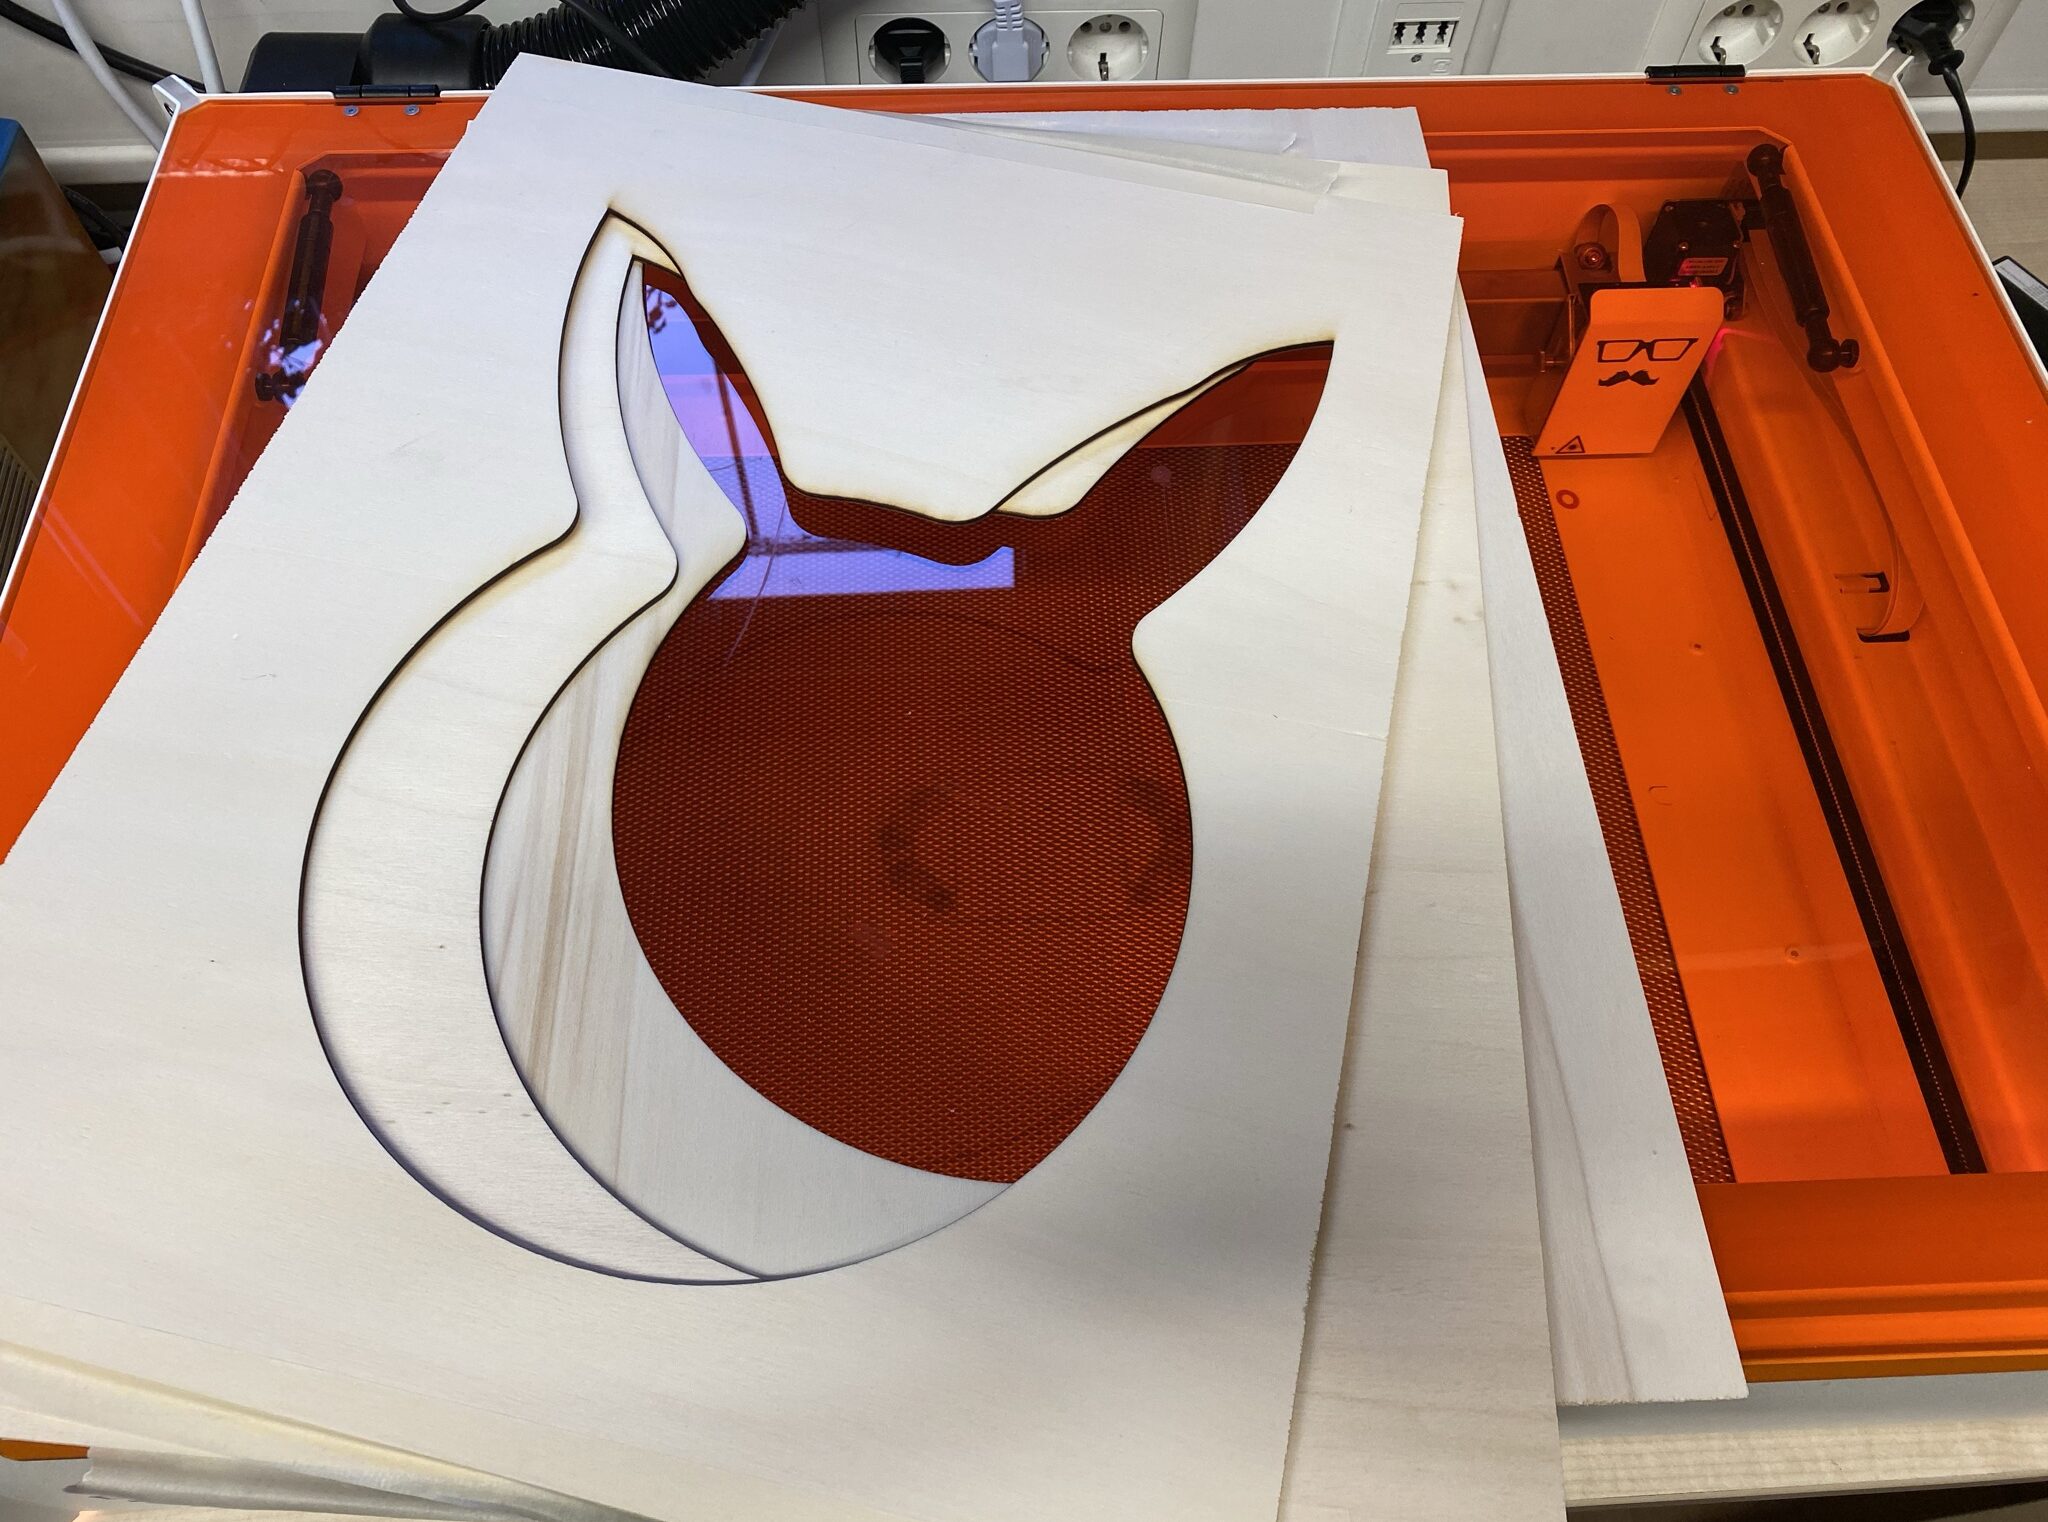
I’d like to have an so called “Alien Cube” as a lamp hanging from my ceiling. And on Thingiverse there is a template for lasercutting one. Link: https://www.thingiverse.com/thing:1805216
But the template is for 10x10x10cm and i want it BIIIIG! My version should be 38cm side length. This Box should then be illuminated by LED stripes and LED-powered light strings. A nice idea. So i redsigned the whole thing added some roundings to the 90° lines and made my template “Kangaroo style” 🙂
Lastly i cut some poplar plywood with a thickness of 3mm. And it took 5 rounds for the lasercutter to get through the material. And as described on Mr. Beam’s Homepage this lasercutter can cut poplar up to a thickness of 4mm and birch multiplex up to 3mm. So i thought: This will be a fast and nice project with the more stable birch wood. I was so wrong.
My lasercutter is cutting that bloody birch multiplex 3mm plate sind 25 hours now 🙂 Its the 35 time the laser is going around and around and around 🙂 I am cutting 10 Hours a day and it seems that 10 hours are similar to 1mm of cutted wood. I hate birch so very much, i ordered a bunch of poplar hoping those plates will arrive soon 🙂
Damn. It takes hours and hours and hours.
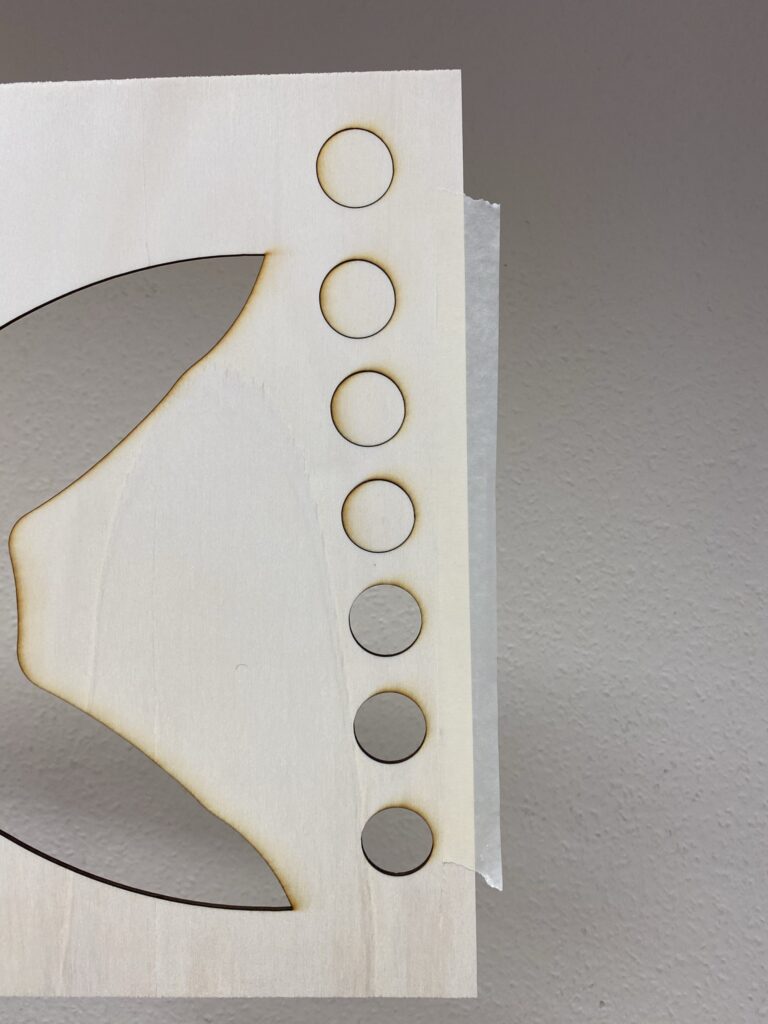
But i want to know how birch multiplex 3mm is cutted, so i stay patient. Normally i demo-cut a few circles on a new material to check how many rounds a cut-through will take. But i forgot this totally. So now i have to wait until i can be sure everything is cutted through. After each cutting-session i open the lid and try to move the cutted pieces but thes still stay in place. Hopefully this gets to an end on the weekend 🙂
After that i will proceed the cut tests with a circle of 1cm and different speeds and power-settings, so i can provide the best setup for cutting birch multiplex with 3mm thickness.
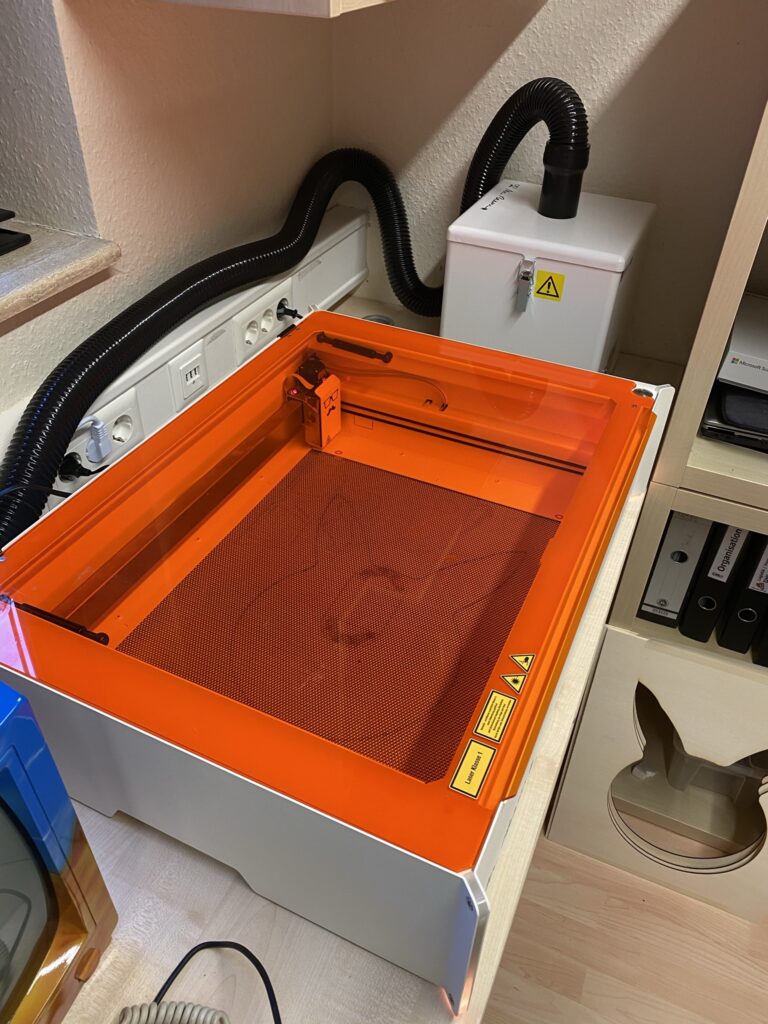
I’ve pledged the Mr. Beam II Lasercutter a few years ago as it was on Kickstarter in 2016 and got the lasercutter Mr. Beam II together with the air filter system a long time after the planned deliverance.
As i lost interest in this item it took a while until i unpacked the parcels and i tried a few cuts with sample graphics. Worked well, but i totally forget ovber the time, why i have wanted a lasercutter so much that i invested a few thoudsand dollars to get one 🙂 And so the Mr. Beam II stood in my old office and got older and older.
Now, a few days ago i’ve planned to set up my office new and make some kind of nerd-dungeon out of this area. So i planned to pin my logo at the wall and thought about how cool this would be to have it backlit with RGB.LED-stripes. SO i overworked my logo and sent my file to an online-printing-company which is printing and contour milling the logo on a 3mm DiBond-plate. But to mount it on the wall i needed a surface to mount the LED strips and the logo-plate itself. So i came up with the idea of lasercutting those suerfaces out of some poplar plywood.
I have had 3mm poplar plywood in my cellar since a few years and some Ponal wood glue. So i started cutting and to get 10mm stripes fit onto the base i needed to cut 4x3mm boards. Worked fine. Took about 40 minutes for each board and after i glued them together i have to wait for the Philips Hue-compatible LED-Stripes so i can control them by script or my Stream Deck-Setup.
The Mr. Beam II Lasercutter – First time i did something productive with it 🙂
So all boards are cut and glued together and are drying at the moment. It worked very easy to do the vector paths in Adobe Illustrator export them as SVG and import them into the Mr. Beam II Software. It took a while until the Mr. Beam II has updated his software. And a lot of error accured but rebooting and re-checking for updates and installing them “as they wanted to” helped and half an hour later (after opening a support ticket at Mr. Beam) and some new reboots it worked and the software was updated as wanted and went from beta-version to a official version.
The basement for the DiBond-print and the LED-Stripes
So i hopefully get my prints during this week and correctly milled 🙂 and then my wall in my new nerd-dungeon shall be set up with my logo (without text) and should be light up by a hue compatible led-rgb-stripe.
As i ordered two boards from the print shop (one for the nerd-dungeon, one for my music studio) i may need to cut another four plates for the basement. but now i have optimized the cutout process for the Mr. Beam II lasercutter so it takes less time than the first set.
I have the problem on RolandRadio, that a lot of people try to modify the charts and register to vote. All users not verified by Mail are deleted after 24 hours to avoid fake users but some of them already mass-voted on titles.
So i needed to find out if there are ratings by users already non existent in the users table. I came up with this mySQL-Solution:
select *
from ratings A
Where Not exists (select 1 from users B Where A.model_id = B.id)
Or without the aliasing:
select *
from ratings
WHERE NOT exists (select 1 from users Where ratings.model_id = users.id)
So i select all from the table ratings and get all those entries where the model_id-column of the ratings-table is not in the id of the users-table.
This brought up 1600 ratings of already deleted users. i hate it that people are so manipulative on the charts. Now i need to do a cron-tab-command to delete ratings of deleted users every day. Also i included
     if (Auth::user()->verified != 1) {
            session()->flash('message', 'You must verify your email first!');
        }
into the rating function to avoid users not verified to rate on titles.